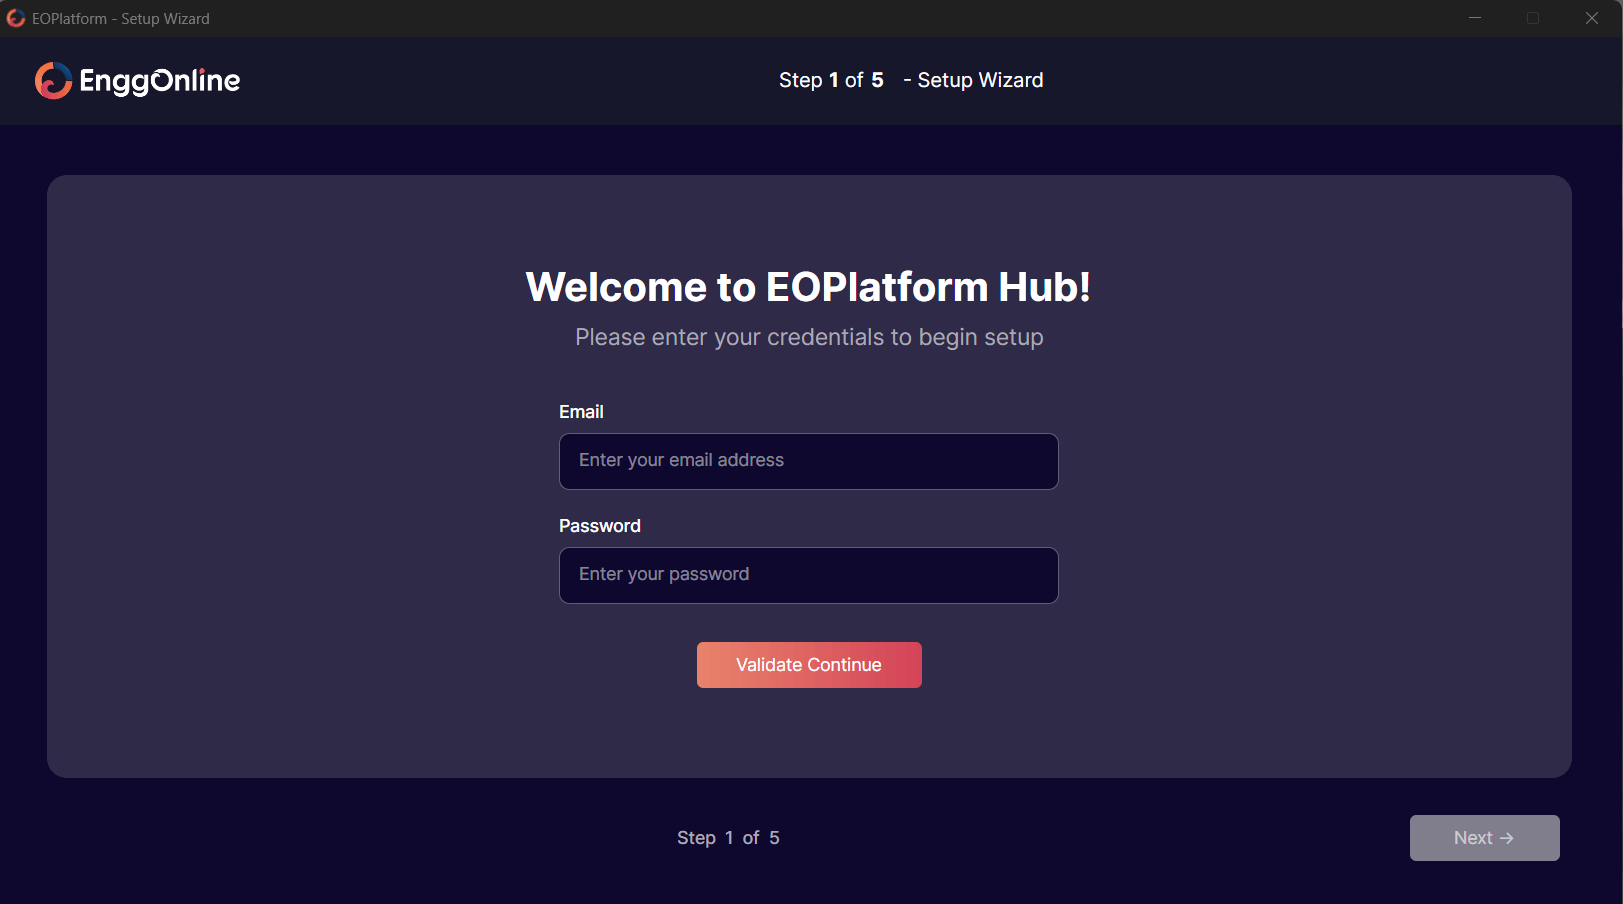
After installation of the hub, you will be asked to onboard for getting the required data needed for hub to run. Enter the email address provided to you.
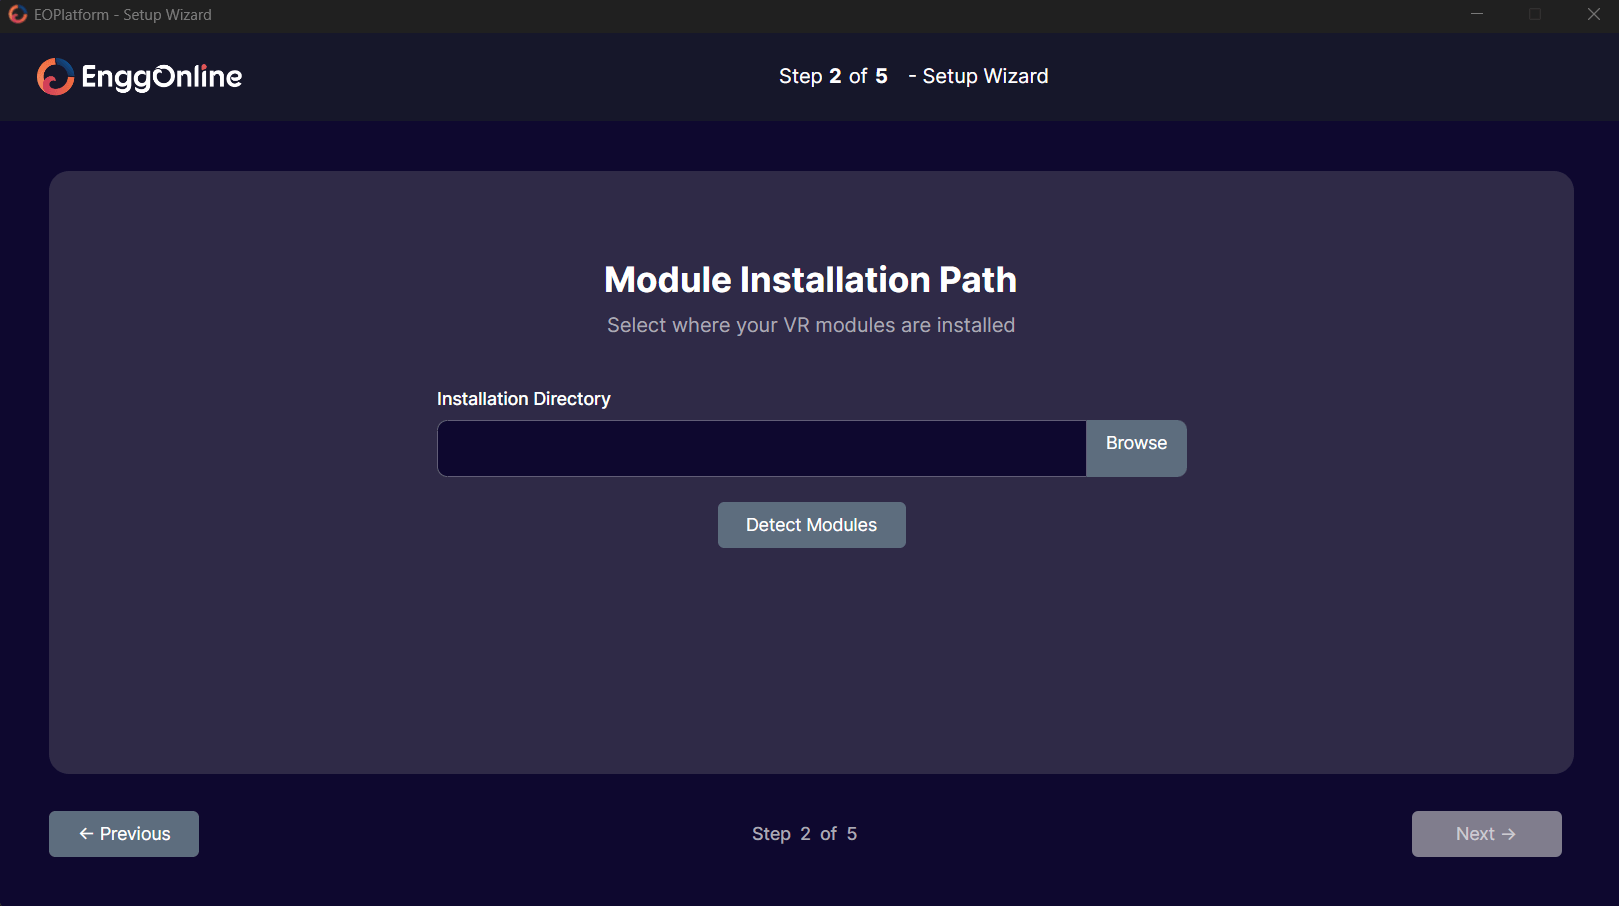
Once the validation is done, select the directory for the hub data to be installed in your computer.
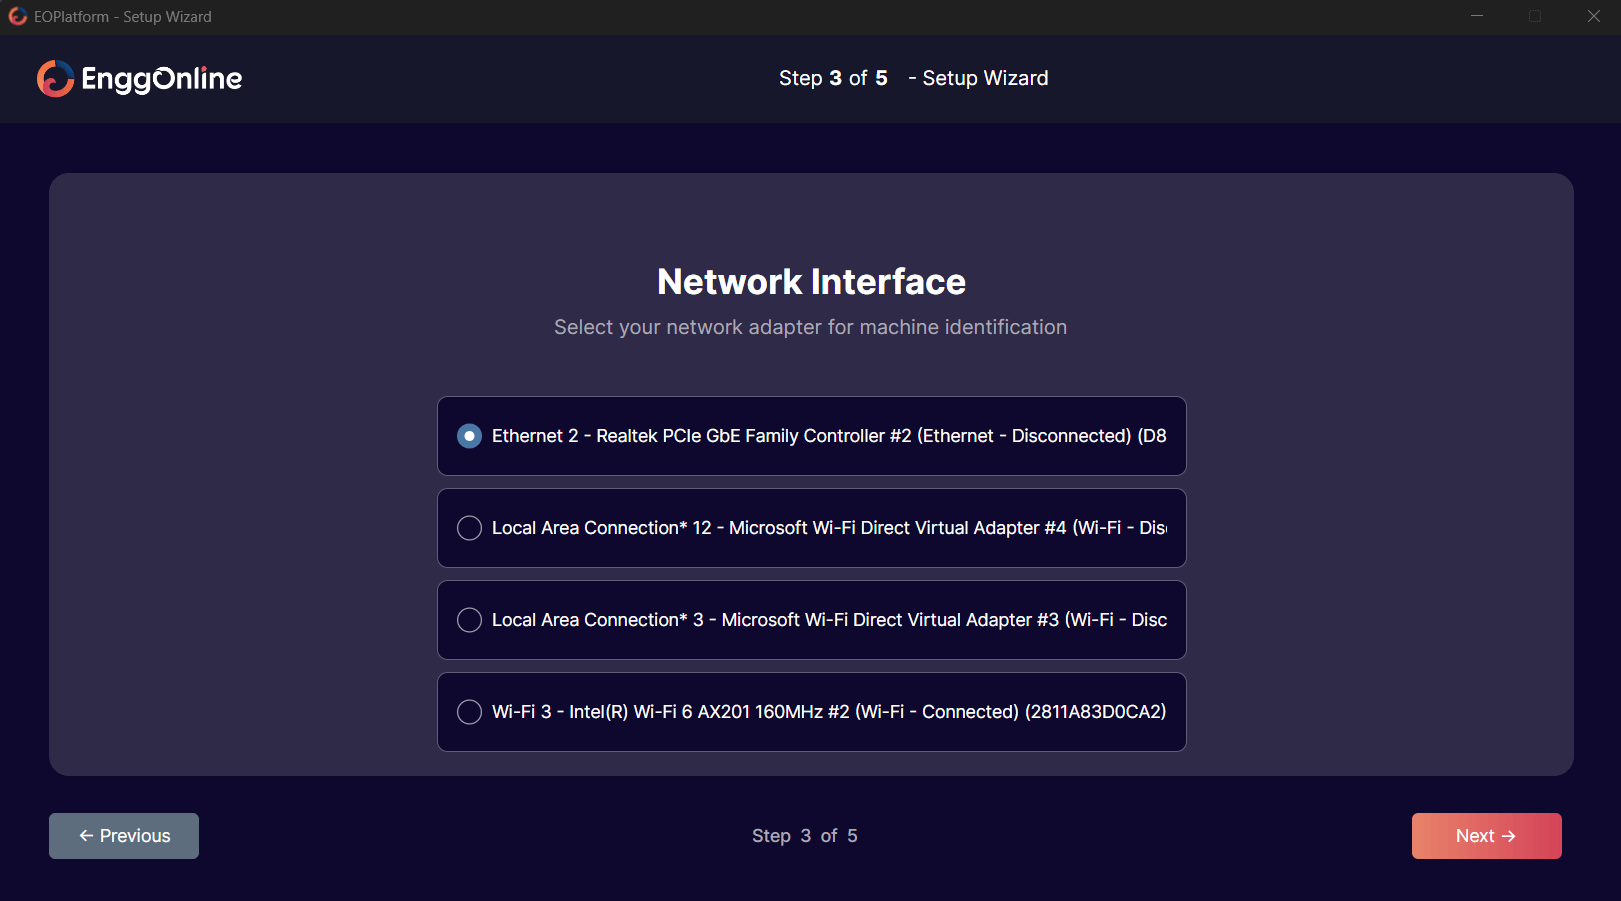
After saving the directory, select a suitable network interface. Select the option that's not going to change in the longer run.
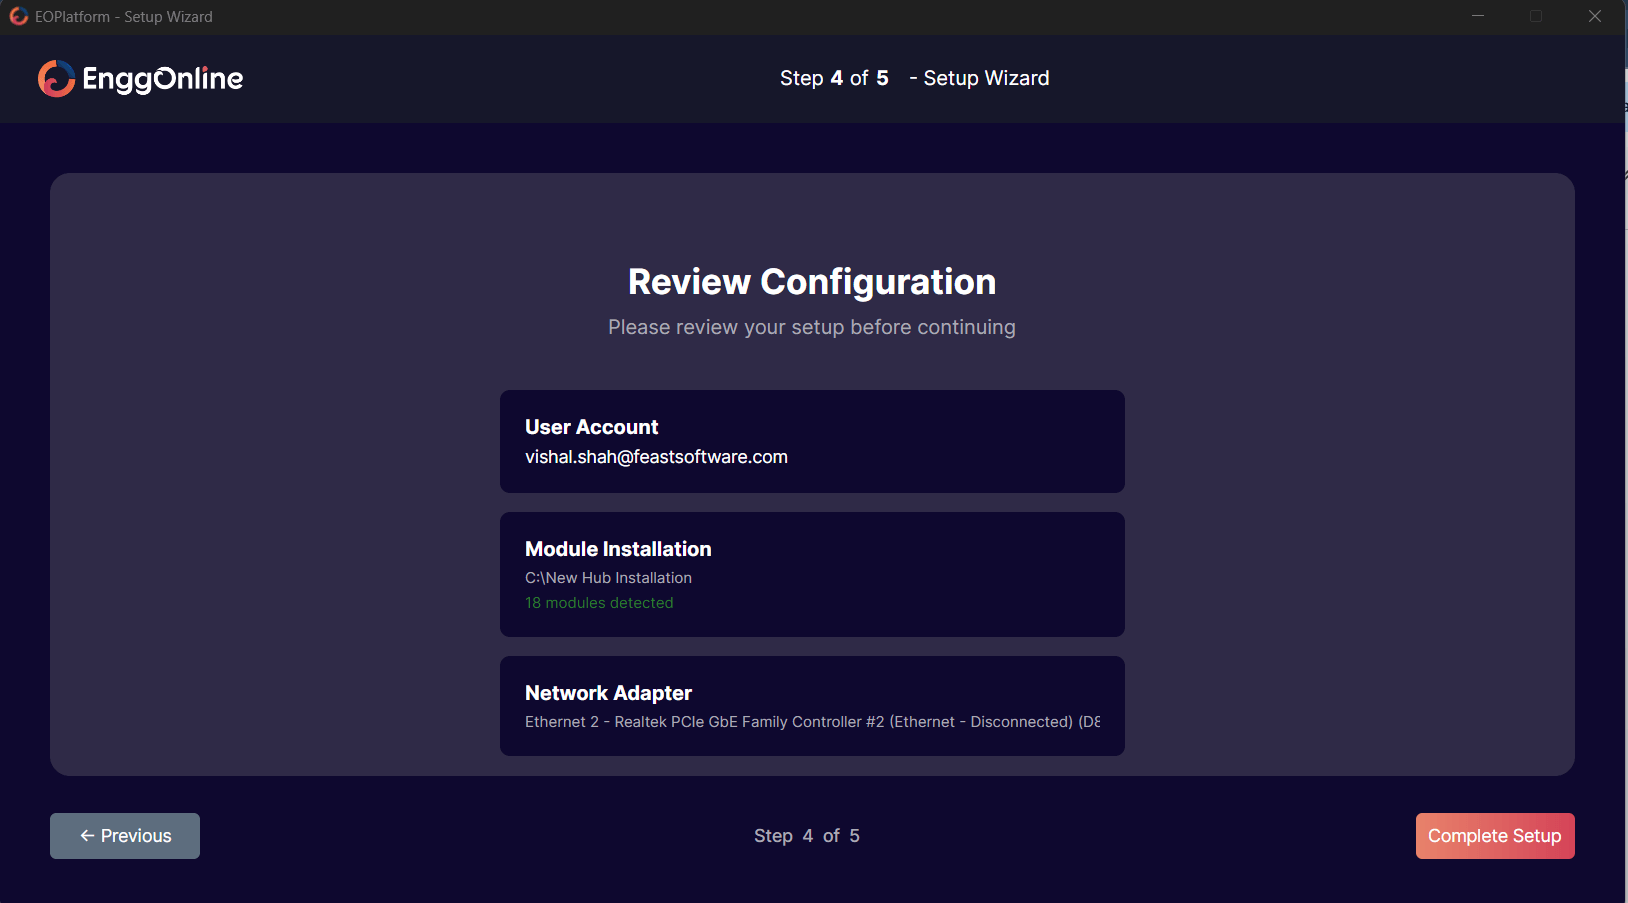
After selecting the network interface, the next screen is for reviewing the information. If it needs to be changed, you can go back to the previous screens and change the information.
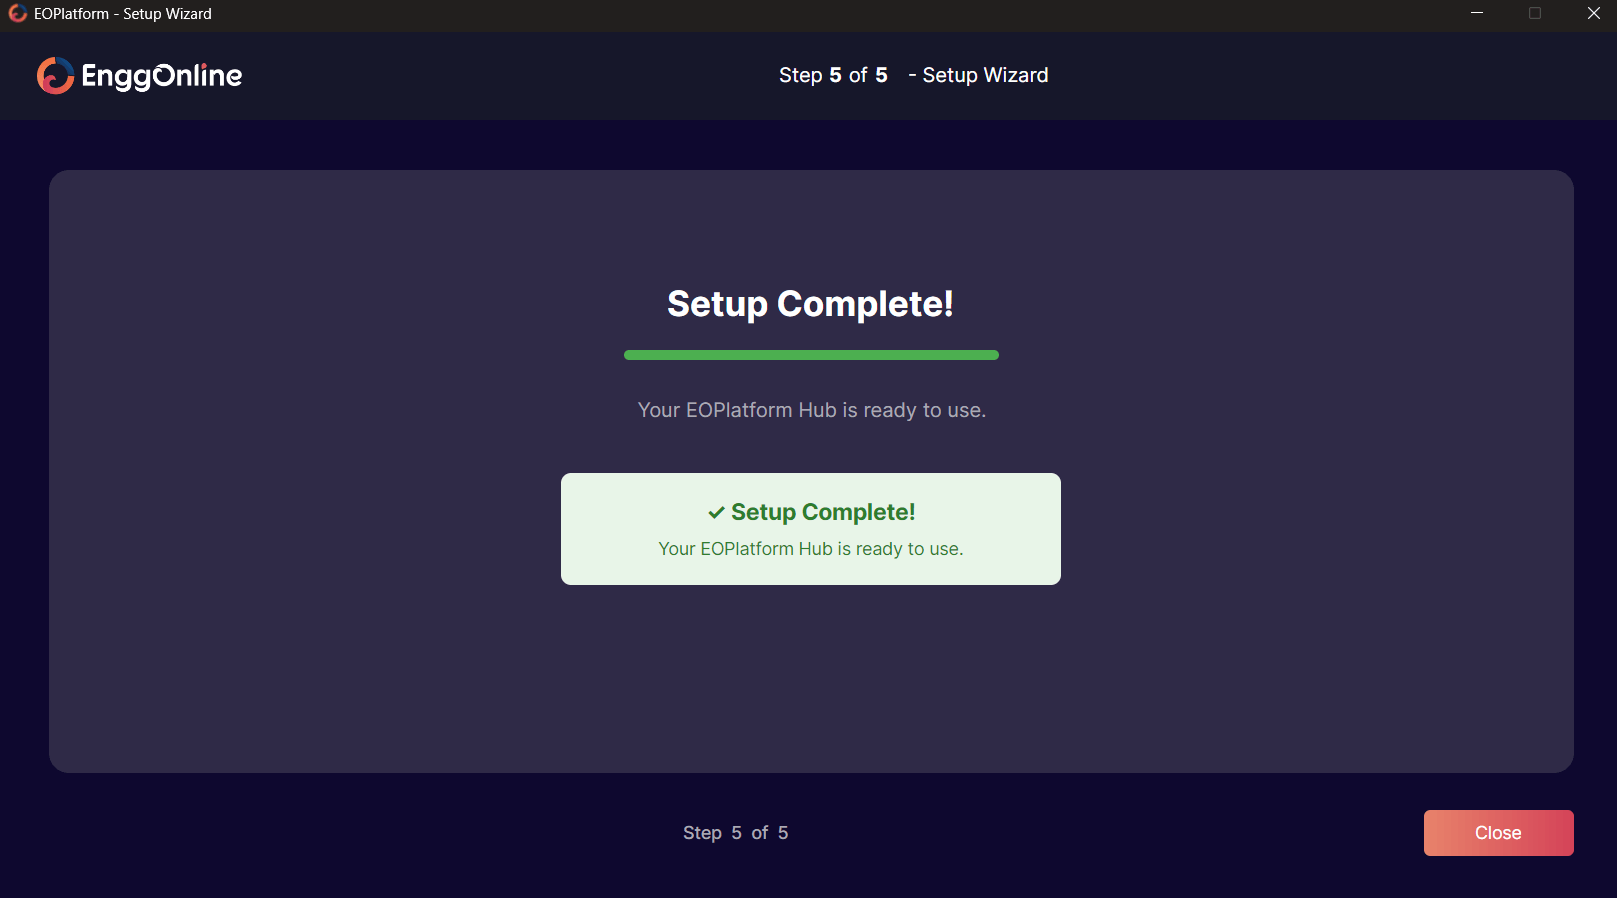
After clicking on the complete setup button, you will receive a msg “Your EO Platform is ready to use”.
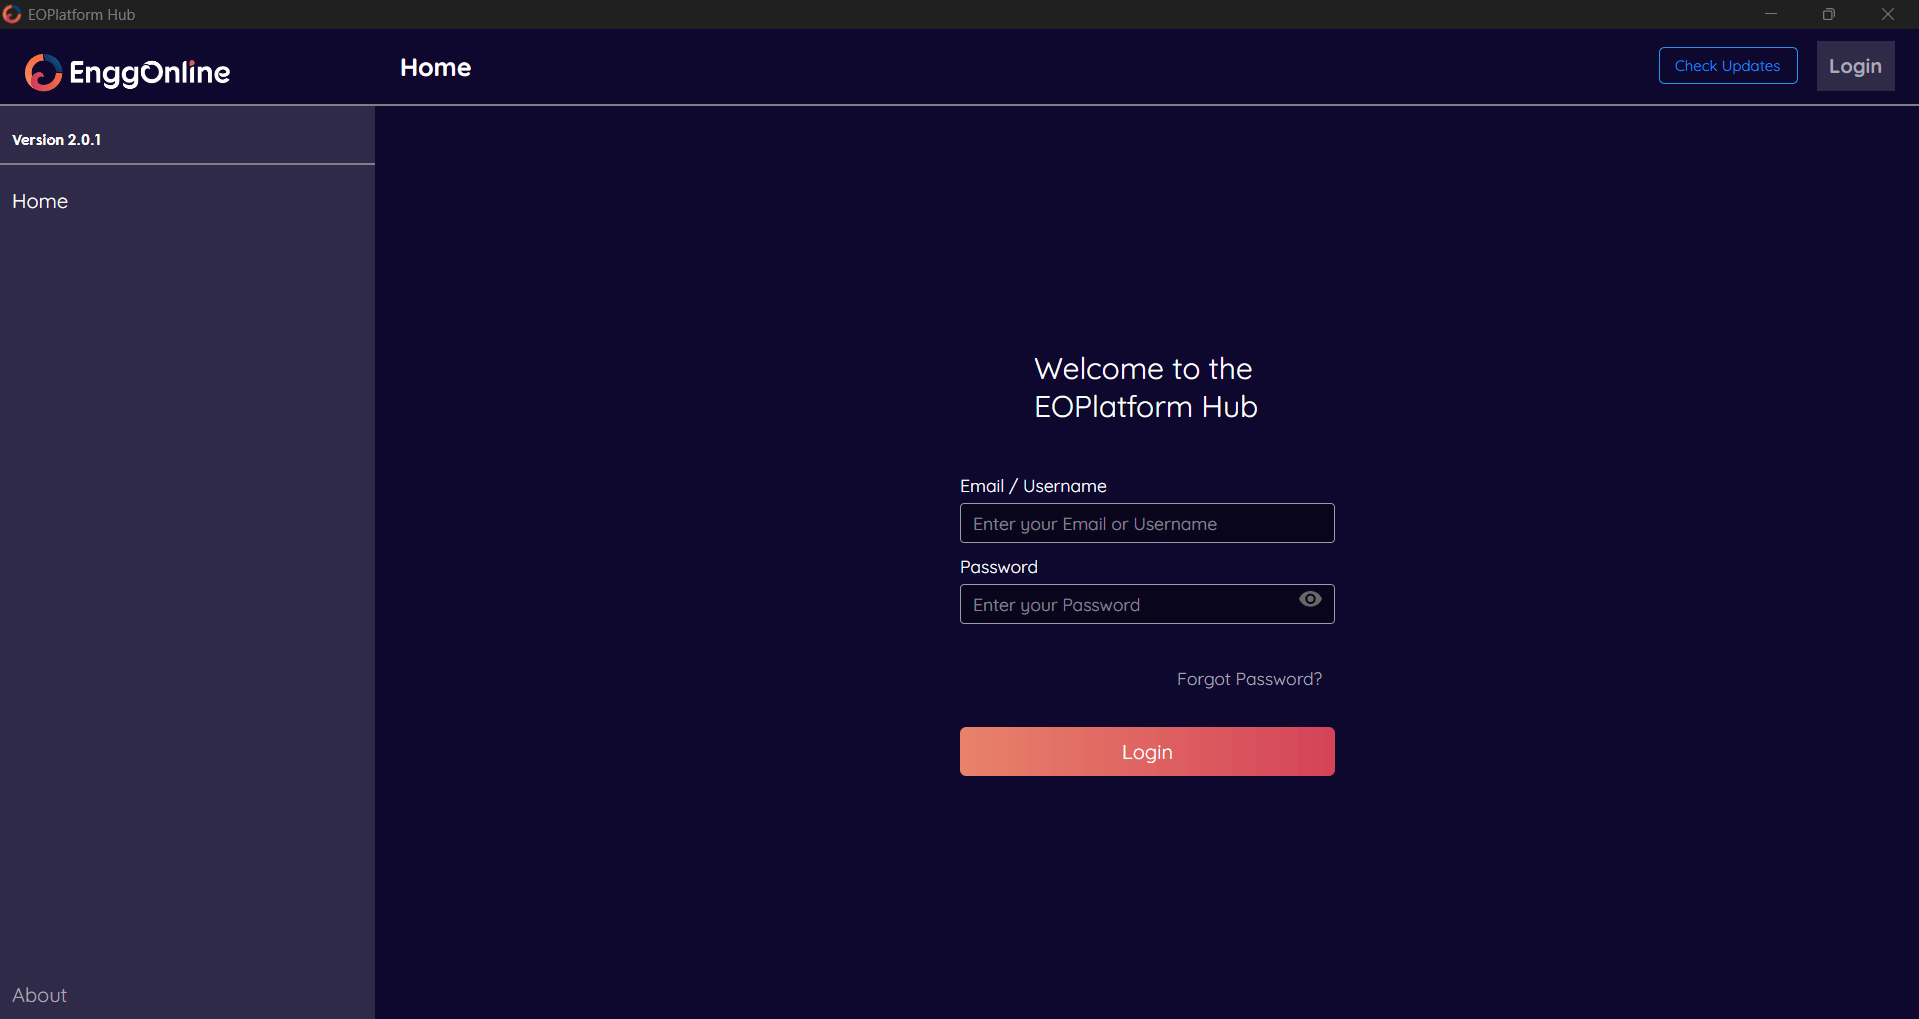
Use your existing username and password to log in to the hub. After a successful login, the hub will display all the packages assigned to you.
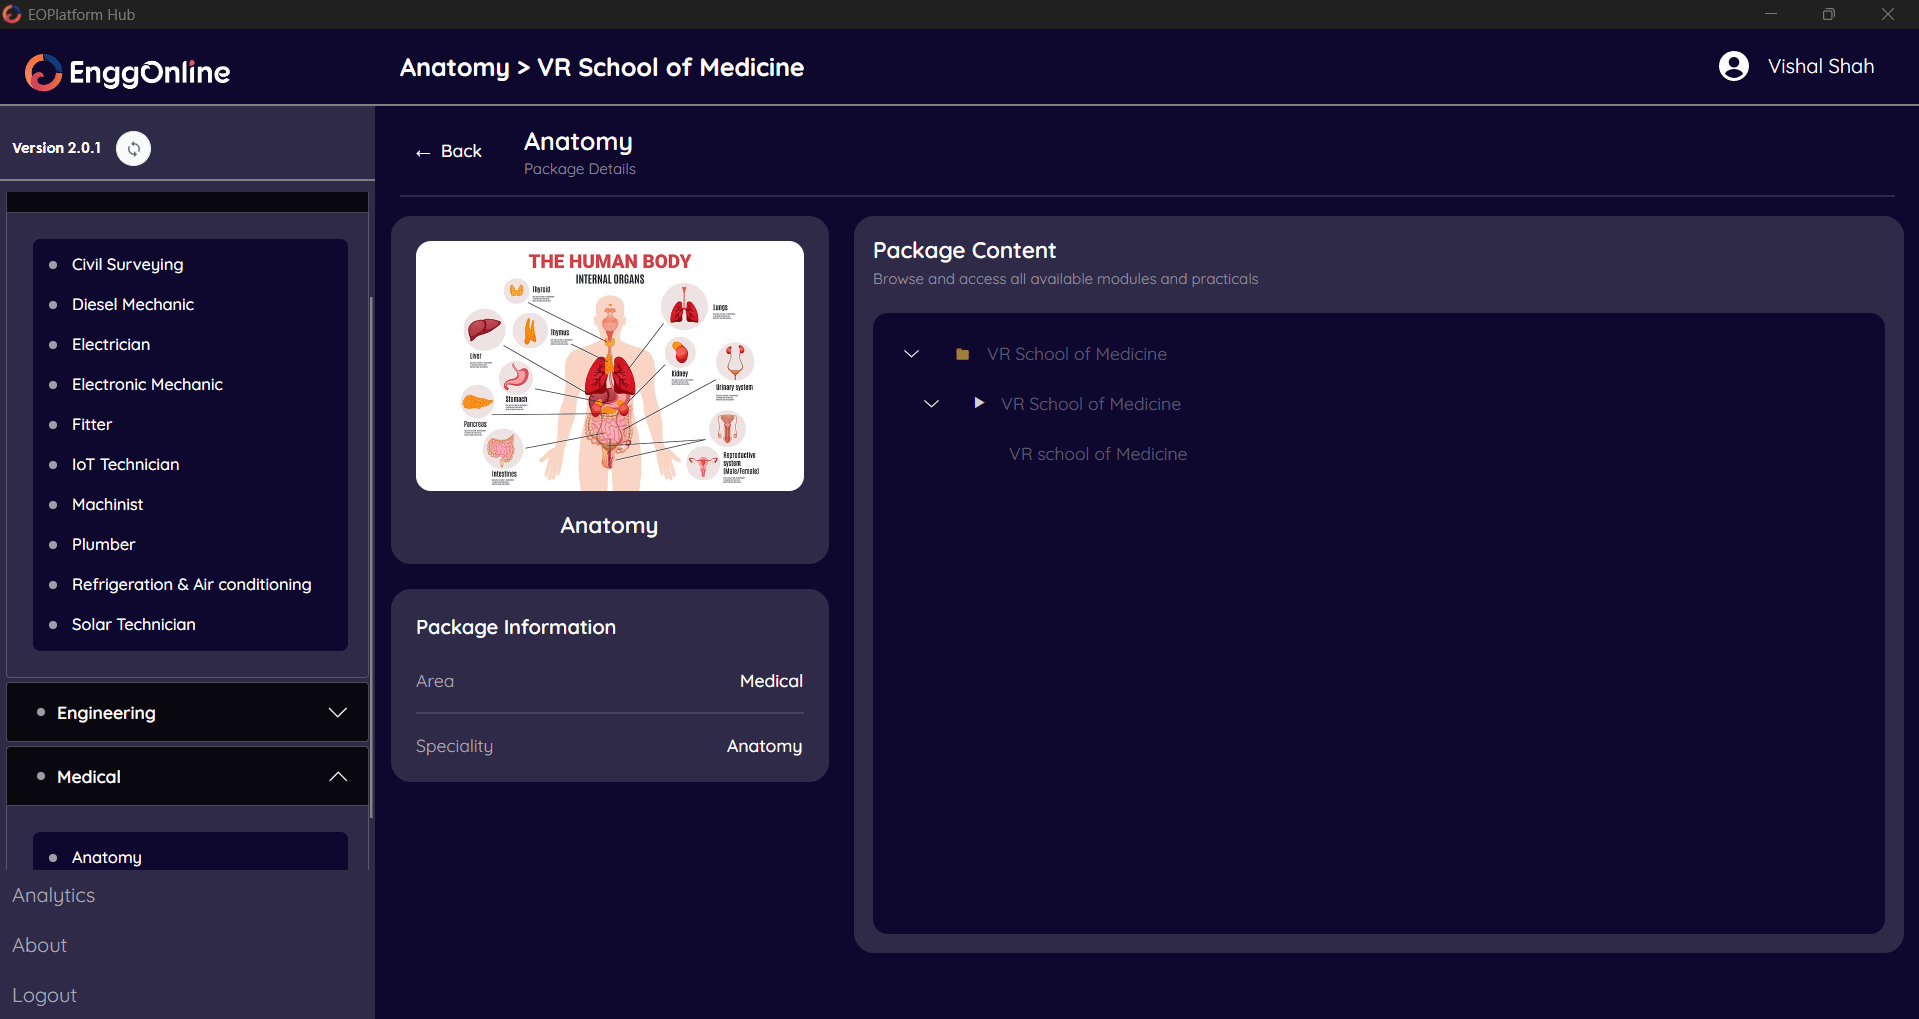
Select the package to view its basic information and the list of content it contains. Click on the content list menu item with the Play icon to proceed to the Download and Install screen.
Click the Download button, then Install to make the simulations ready to use. After installation, you can launch the simulation by clicking the Launch button.


Enter the PIN assigned to you in the popup that appears when you click the Launch button to start the simulation.

L&T

SRM University, Chennai

Parul University, Vadodara
SVNIT, Surat

Don Bosco Training Institute, Mumbai

Marwadi University, Rajkot

Terna Group of Institutions, Navi Mumbai & Osmanabad

Marksans Pharma, Goa

IIT Gandhinagar

AFCONS

Forbes Marshall

UPL

MIT, Aurangabad

NICMAR, Pune

ANTTC, Kharel

IITRAM, Ahmedabad
COEP, Pune

ARMIET, Mumbai

NITK, Surathkal

IIT Madras